This post documents a technique that I used to set up DNS in AWS inside a VPC. Setting up DNS in a VPC is quite easy to do and allows you to use consistent naming across all your cloud and non-cloud servers. (You might also be interested in this discussion of how to configure AWS VPCs.)
This DNS name resolution technique for AWS VPC is one that I like. There are probably dozens of ways of achieving convenient domain name resolution in a VPC, but I like this one because it works well when you have a mixture of OSs in private subnets that need to communicate with each other. And for private VPC subnets, it only exposes non-routable IP addresses while allowing public subnet servers to have their names resolved to AWS elastic IPs (EIP) via DNS. Because these RFC 1918 addresses are non-routable, there’s no information leakage by allowing DNS in your VPC to resolve them on the internet.
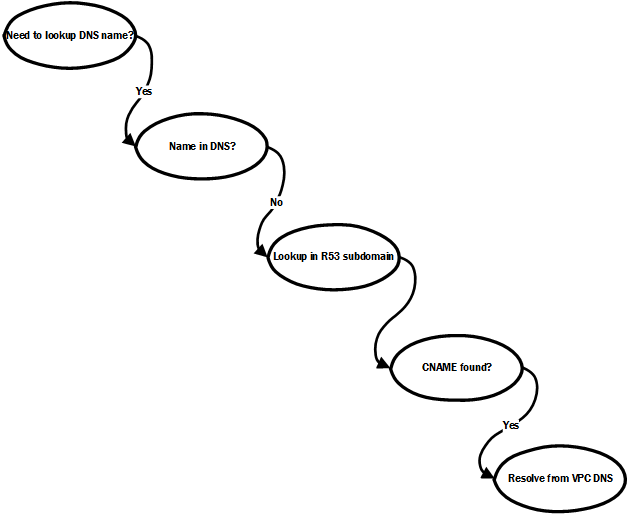
Once you get the hang of how this works, you’ll never think twice about it. But until then, it takes a little thinking through. Remember how DNS name resolution works: first, the hosts file, if any, is checked to see if it can resolve the name. Next, the local DNS server is queried. If the local DNS server cannot resolve the request, it will request (and usually cache) the entries from an authoritative DNS. If what it gets back from this query isn’t an address but is instead a canonical name (CNAME), the DNS server restarts the request, using the CNAME it received (see this Wikipedia entry on DNS). I rely on the way CNAMEs work in combination with the name resolution provided by VPC DNS.
First, we make sure to set up a VPC with an AWS-provided DNS resolver. Then, if a CNAME is returned for a request, the VPC DNS resolves it to the internal address in the VPC. In other words, all you need to do is to create CNAME records in a zone file (preferably Route 53 because it’s easy and inexpensive) and use the AWS-provided DNS server.
Yes, it’s a loopedy-loop. But it works — and works well.
This overview relies on CNAMEs coupled with Amazon’s DNS service, Route 53. Here’s how it works.
Here’s more of a step-by-step breakdown that should help you implement this in your own VPC.
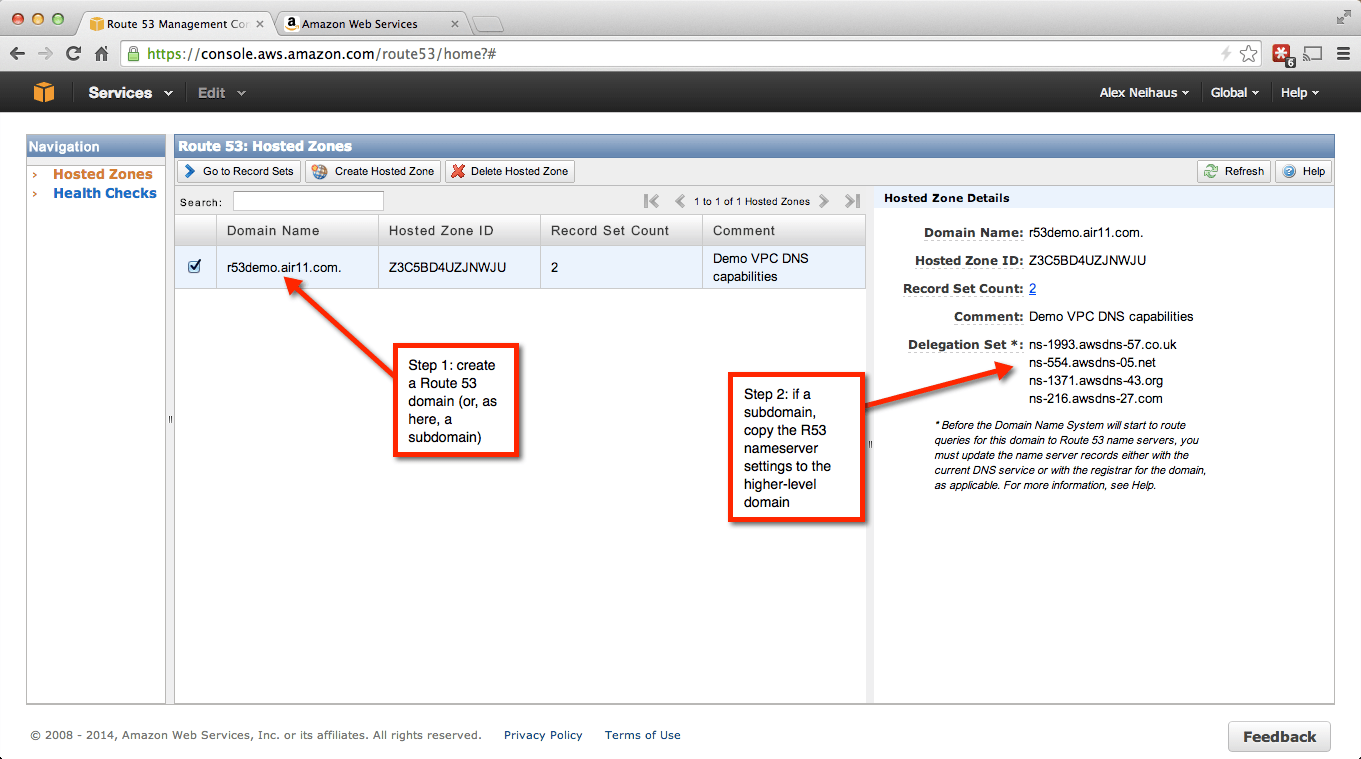
First, you want to set up your domain in Route 53. Route 53 has superior support for subdomains. That makes it possible for you to use a subdomain of a corporate domain that you can manage in Route 53 just for your VPC. In this model, the root corporate domain delegates control of a subdomain to Route 53. This is an extraordinarily convenient way of using DNS in a VPC
Unless you have direct access to the name servers for the base domain, this is the best way to go. Using a Route 53 subdomain for your VPC-managed domain means the owner of the base domain updates the base domain name servers just once. Thereafter, you can use Route 53 to manage the DNS names of your EC2 instances in a VPC without affecting the root corporate domain.
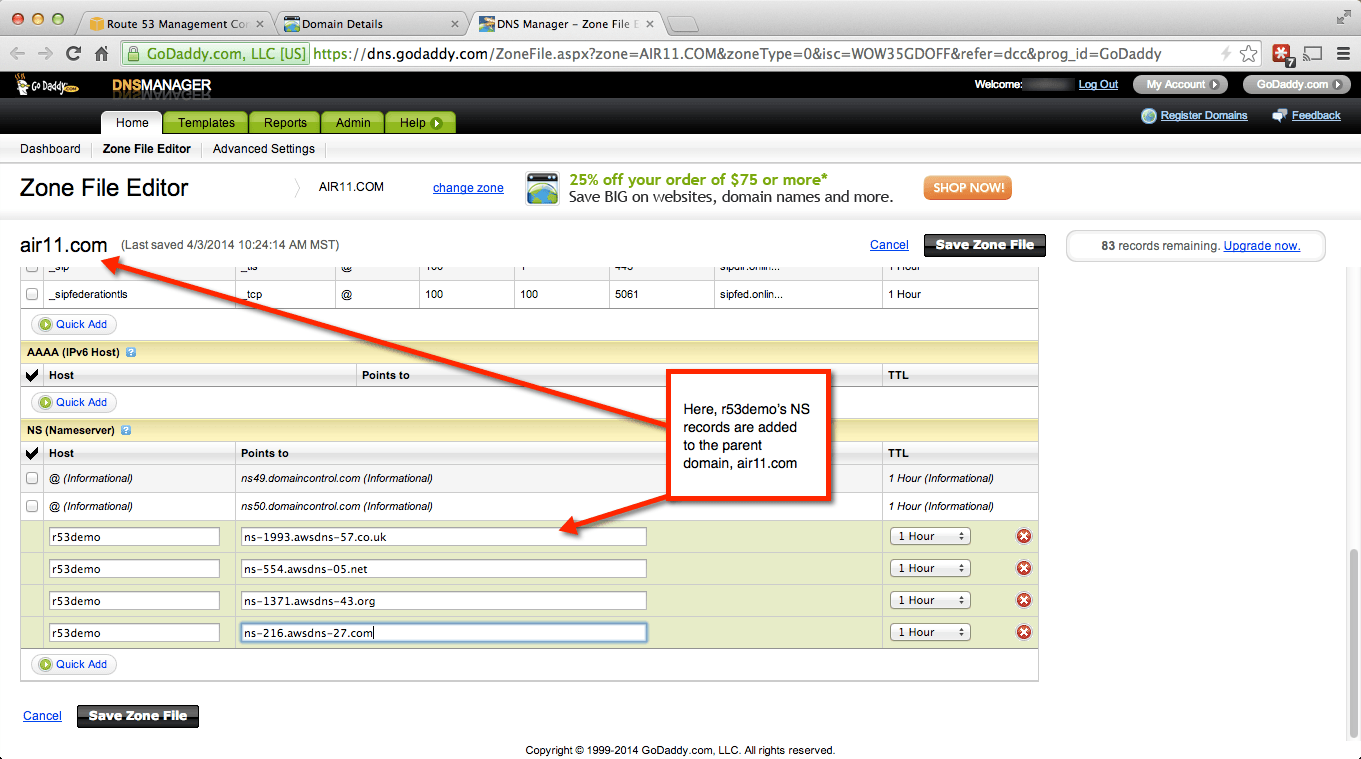
The subdomain approach is what I have illustrated here. Start by setting up the Route 53 domain and then add the generated name server entries to the base domain. These two screenshots show how to create a subdomain in Route 53 and add the name servers to a base domain, in this case air11.com which I own and which was registered at GoDaddy when this post was written.
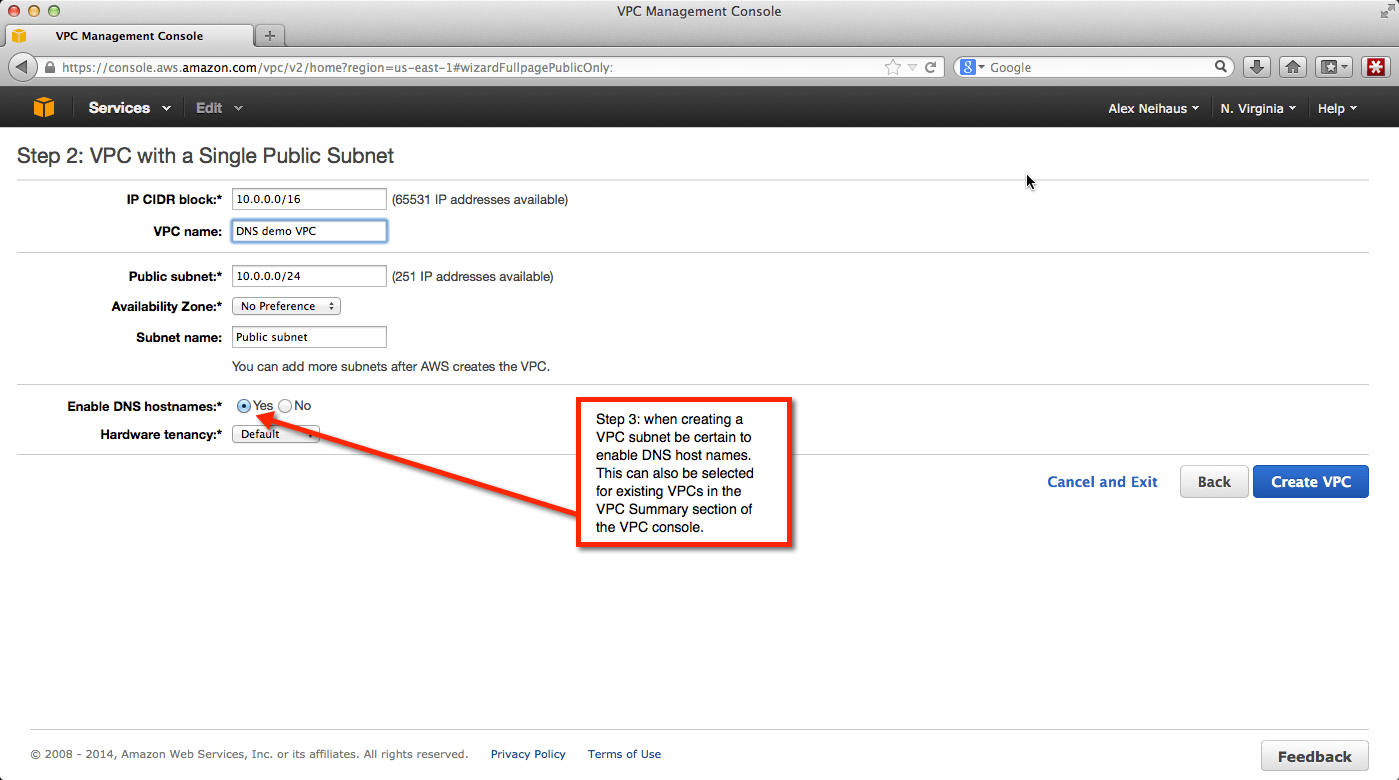
Next, make sure to select name resolution when you create your VPC. (It can also be added later.) This is what tells AWS to insert a DNS resolver in your VPC. AWS automatically selects where to place the VPC — this is why you must leave the first few subnet addresses free in each subnet; the DHCP and DNS servers go into those addresses. If, for example, your VPC contains the subnets in 10.0.0.0/16, the DNS will be at 10.0.0.2. AWS calls this the “plus-two” address. This screenshot shows what to select when creating a VPC. For more info on how AWS VPC DNS works, see this link. Remember: make sure to not use the first five or so addresses in your VPC’s subnets so AWS can map the DNS server into each of you VPC subnets!
Once you’ve set up your (sub)domain and given it time to replicate, you can add your own names to the Route 53 entry set. The trick here is to make sure that a) you use a CNAME entry and b) you use the AWS DNS-generated name for the instance. That is, of course, what the DNS server in the VPC uses to map to the actual IP address. You can get the internal name from the EC2 console for that instance, if you allowed AWS to assign a private address randomly. My personal best practice is to assign private IP addresses in ranges at instance creation so I know in advance how the CNAME entry should be created. Six of one, half dozen of another — just as long as you are certain you have the right name from the VPC DNS.

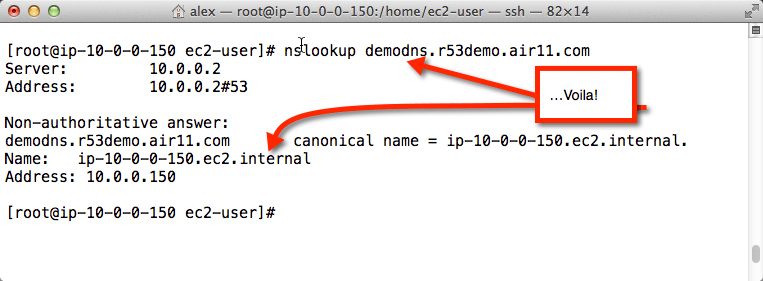
And presto! Now you can use real names that resolve inside the VPC for your EC2 instances! In the screenshot below, you can see that I did an nslookup for the Route 53-managed name, which resolved to a CNAME, which resolved to the internal IP address in the subnet, courtesy of the VPC DNS server.
Leave a Reply