 Vagrant is the latest in a string of tools that developers have swooned over of late. It’s a clever system for creating virtual machines easily and quickly. (And, blogging about it gives me the chance to use a graphic from the very best Jethro Tull album ever — “Aqualung” — whose cover sports the archetypal vagrant.)
DevOps folks seem particularly taken with Vagrant when combined with Chef and/or Puppet. I can see the appeal — but coming off a recent DevOps engagement where I used Chef I have very mixed feelings about the DevOps craze. Today, the whole configuration management, “infrastructure as code” movement is primarily driven by development teams. These teams are accustomed to a state in which the product is never quite finished. (Ask a Microsoft Office developer if the product is done. She’ll say, “Of course not.” But neither you nor I have needed any new features in Office since the version released 10 years ago.) But application infrastructure — the “built environment” in which the system runs, to borrow a phrase from architecture — must be complete. Apply the classic development team’s perspective of continuous improvement to something like configuration management, especially CM that’s code driven, and you have a freakin’ mess.
I’m sorry, but I am calling bullshit on much of the DevOps “process” when it becomes not a means to an end but yet another intensive development project inside a development team. I’ve yet to see a DevOps team that focused more on the “ops” than the “dev.” Yet it’s the ops side of the equation that DevOps is supposed to improve.
Anyway, back to Vagrant. To use it to spin up EC2 instances, simply install it, add an AWS “dummy” box and create a Vagrant file to launch an instance. In Linux, this is especially convenient as you can start the instance, ssh into it, stop it and terminate it all from a local command line.
Below is a sample Vagrant file for creating a simple EC2 instance with an Elastic IP. Note if you run your EC2 instance in a VPC and ask for a public IP to be assigned during Vagrant “up” (the command to create an instance), the one-way sync of files that Vagrant performs from the local machine to the remote instance fails as does ssh login. So, to keep it simple, assign a previously allocated EIP in your first Vagrant file. That’s what this sample file does.
Here’s a step-by-step list of things to do to get your first AWS Linux instance running via Vagrant:
- Download Vagrant for your OS; install it (and for Windows, reboot)
- Using Terminal (Mac/Linux) or a command prompt (Windows):
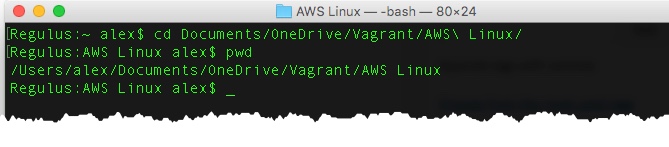
- Create a subdirectory where you will keep the definitions of the particular instance you are about to create. Here, I keep my EC2 instances in a subdirectory of a Vagrant directory
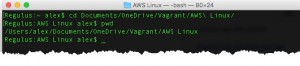
(click to enlarge) - Install the vagrant-aws provider
vagrant plugin install vagrant-aws - Install a dummy Vagrant “box”
- Create a subdirectory where you will keep the definitions of the particular instance you are about to create. Here, I keep my EC2 instances in a subdirectory of a Vagrant directory
vagrant box add dummy https://github.com/mitchellh/vagrant-aws/raw/master/dummy.box
<li>Copy and edit this Vagrant file, replacing the values noted with your AWS credentials and simply issue <code>vagrant up</code>
Vagrant.configure("2") do |config|
  config.vm.box = "dummy"

  config.vm.provider :aws do |aws, override|
    aws.user_data = "#!/bin/bash\nsed -i -e 's/^Defaults.*requiretty/# Defaults requiretty/g' /etc/sudoers"
    aws.access_key_id = "YOUR ACCESS KEY"
    aws.secret_access_key = "YOUR AWS SECRET"
    aws.keypair_name = "YOUR kepair"
    aws.ami = "ami-60b6c60a"
    aws.instance_type = "t2.micro"
    aws.elastic_ip = "YOUR ELASTIC IP ADDRESS"
    override.ssh.username = "ec2-user"
    override.ssh.private_key_path = "PATH ON YOUR LOCAL MACHINE TO THE PUBLIC KEY DOWNLOADED FROM AWS"

    aws.tags = {
      'Name' => 'AWS Linux test instance', #Change as appropriate
      'Description' => 'AWS Linux test instance 2015-12-04' # Change as appropriate
    }
  end

end
Success looks like the screenshot below.
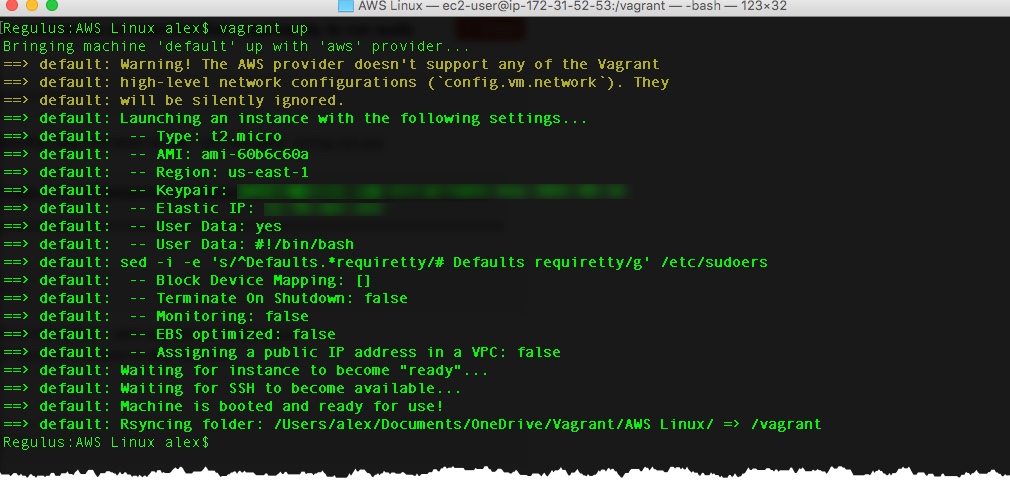
rsync the contents of the local subdirectory to the /vagrant mount on the newly-launched EC2 instance.
That last point needs a little explanation: in AWS, the sync is one-way from your machine to the EC2 instance and only at vagrant up, vagrant resume, or vagrant provision time. If you want to upload a bunch of files, just put them in the Vagrant subdirectory and restart the instance. Because Vagrant knows all about the EC2 instance, you can simply vagrant ssh to it right from the command line.
Presto! A fully functional, repeatable AWS Linux instance you can customize to your heart’s content.
Leave a Reply