
If you, like me, trust no one on the Internet; if you know Internet and security are two words that never really go together; if you really understand the cesspool of danger that the Internet is, you would never fill in a web form that doesn’t use SSL.
Having just completed the new Zixi website, which contains a contact form, I set out to add SSL (more properly, TLS or Transport Layer Security) to this form.
It was a geek love-fest, a challenge, an achievement. But it wasn’t easy. So, in this post I will outline the steps I took to succeed using WordPress 3.5.1 hosted on an Amazon Web Services instance running AWS Linux (really, CentOS). I will not be detailing every nuance, since that’s what Google is for. Instead, I hope that others will use this info to make the progress with greater ease simply by having a roadmap. The route you take is up to you.
Here’s an unsorted list of things you need. If you do not have these things, you must acquire them. It’s good if they are all under your direct control, as they were in my case. If you need others to help with this, it’s going to take a lot longer because you won’t be able to experiment and see your changes right away. Installing SSL took me only a day because I had direct access and control of the servers. IOW, it’s best if YOU are the Linux sysadmin and WordPress admins, all rolled into one.
- root access to your server. You must have this in order to manage certificates, certificate signing requests (CSRs) and keys. ssh into the the server is best. This is more complicated for AWS users since root is unable to login directly. Instead, you must use PuTTY on Windows and Terminal on the Mac to ssh into the instance using an AWS-created keypair. If you have another kind of server hosting your WordPress instance, make sure you get the ability to sudo to root. You also need ftp access to a directory on the target server; something in /home is good.
- Get good at the Linux command line. Learn vi, chmod, chown, mv, cp, tail and grep. Learn how to use the service httpd restart command (you just did). If this stops you in your tracks here, good. You cannot succeed unless you do this.
- Get a test WordPress system to try this on. Ideally, it’ll be a duplicate of your production system under a different URL. This is just too complex to try on a production system. Plus, you will get practice in editing the Apache configuration files that you need to change to implement SSL. Since the two systems are using different URLs, you will need to change the configuration files to match the system you are on — it’s an ideal way to learn the meanings of the directives in the configuration files.
- Learn where things are. In CentOS, you will spend an enormous amount of time in /etc/httpd/conf.d (for Apache configuration files). Your certs and keys should live in the default paths /etc/pki/tls/certs and /etc/pki/tls/private.
OK, so if you’ve read this far, you’re really dying to get this to work and are ready for the intensely geeky experience you are about to have. Here are the general steps, in order, I used to get SSL to work for one form. Note that I deliberately did not want a site completely in SSL site even though that would be very easy to do with a simple directive in .htaccess.
zixi.com uses SSL for WordPress admin and selected pages (essentially one page at the moment, the contact form). This means that you don’t have to “pay” for the SSL overhead for each visitor unless they are interested enough to give you their contact info. In return for a visitor giving you info, it’s worth the small overhead negotiating an SSL connection and assuring them their info crosses the Internet encrypted.
- Login to your server and generate a certificate signing request (CSR). Digicert provides superior instructions on how to do this for CentOS here. If you get errors, you probably need to install OpenSSL and, while you are at it, mod_ssl in Apache. See the yum command (remember, we’re talking CentOS here). The CSR process will create your public and private keys as well as the CSR. In fact, the CSR is signed with your public key. DO NOT LOSE THE KEYS. Keys and certs and CSRs are teeny little files. But once misplaced or lost, they are irreplaceable. I kid you not — these things are hugely important.
- Decide on a certificate provider. Features and costs are all over the place. I chose a “wildcard” cert so I could support *.domain.com with one cert. I suspected this would be useful for using a single cert on both my test and production AWS instances. It turned out to be the case. If you have the dough, go ahead and buy a single-domain cert for each system. Whoever you choose as your cert provider, you must cut-and-paste the CSR into their website. The CSR is what the SSL cert provider uses to “stamp” your cert with their public key. It’s this action that makes browsers accept the cert as valid and as part of the “chain of trust” that users rely on for authentication. Place the cert you are provided with along with any “intermediate” certs in your temporary directory on the server.
- Move your certs into position on the server. Certs belong in /etc/pki/tls/certs and keys in /etc/pki/tls/private. I also put the original CSR into /etc/pki/tls/certs for safe-keeping. Make sure root owns them and their permissions are 664.
- Configure Apache. This is, of course, easier said than done. There are limitless combinations and for all the grandeur that is Apache, it’s impenetrable. Here’s what I used. I am certain there are other, better ways, but this works for me. There are two crucial files. First, the SSL configuration, which by default is stored in /etc/httpd/conf.d/ssl.conf. Here’s an extract of what I used. I have only included the directives that I changed from the default. You shouldn’t mess around here. Change only what you need to get it to work. Changing the cipher suite is optional, but I did it in order to get a grade of “A” from SSL Labs, which can grade your site and which I recommend. It’s beyond what I am going here, but you must change the cipher ordering to get an “A” from SSL Labs.
SSLHonorCipherOrder On

SSLCipherSuite ECDHE-RSA-AES128-SHA256:AES128-GCM-SHA256:RC4:HIGH:!MD5:!aNULL:!EDH

SSLCertificateFile /etc/pki/tls/certs/zixi.com.crt

SSLCertificateKeyFile /etc/pki/tls/private/star_zixi_com.key

SSLCertificateChainFile /etc/pki/tls/certs/gd_bundle.crt>
Next, here are the changes I made to my Apache “virtual server” configuration. Basically, virtual servers allow Apache to serve different websites from different subdirectories on the file system to different incoming URLs. Very useful. You can name your virtual server file anything you wish, but for Apache to see it, it should be in /etc/httpd/conf.d unless you have changed the core Apache defaults. Here is what I did to serve BOTH the non-SSL and SSL versions of the site:
NameVirtualHost *:80

NameVirtualHost *:443

ServerAdmin [email protected]

DocumentRoot /var/www/html/wordpress

ServerName www.zixi.com

ErrorLog logs/error_log

CustomLog logs/access_log common

Options Indexes FollowSymLinks MultiViews

AllowOverride All

Order allow,deny

Allow from all

SSLEngine On

SSLCertificateFile /etc/pki/tls/certs/zixi.com.crt

SSLCertificateKeyFile /etc/pki/tls/private/star_zixi_com.key

SSLRequireSSL On

SSLVerifyClient none

SSLVerifyDepth 1

SSLOptions +StdEnvVars +StrictRequire

ServerAdmin [email protected]

DocumentRoot /var/www/html/wordpress

ServerName www2.zixi.com

ErrorLog logs/error_log

CustomLog logs/access_log common

Options Indexes FollowSymLinks MultiViews

AllowOverride All

Order allow,deny

Allow from all
Some points to keep in mind include that you must have port 443 open on your firewall (for AWS users, in the security group) for Apache to listen for incoming SSL connections and obviously, change your the filenames in the sample to match your keys, etc. When you are ready, restart Apache with service httpd restart.
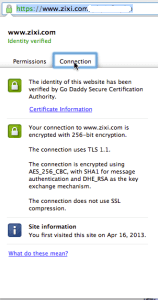
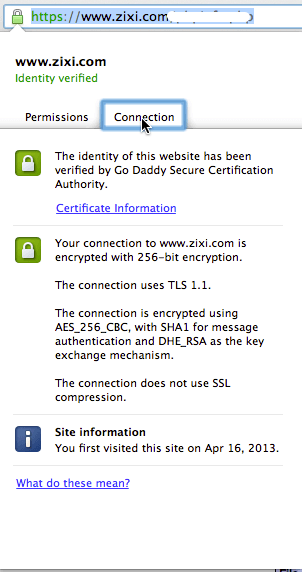
- Put up a single page in the WordPress directory that you can test to see if you can connect via SSL. The simplest page is, of course, a “hello, world” page. But you can also use a simple php call in a page, like phpinfo(). Explicitly ask for the page over SSL, for example, https://www.mydomain.com/mytestpage.php. If you connect over SSL, enjoy the moment by viewing the cert in the browser. This varies by browser, but is something you should learn how to do. Hint: in Chrome click the lock icon, as in this image.
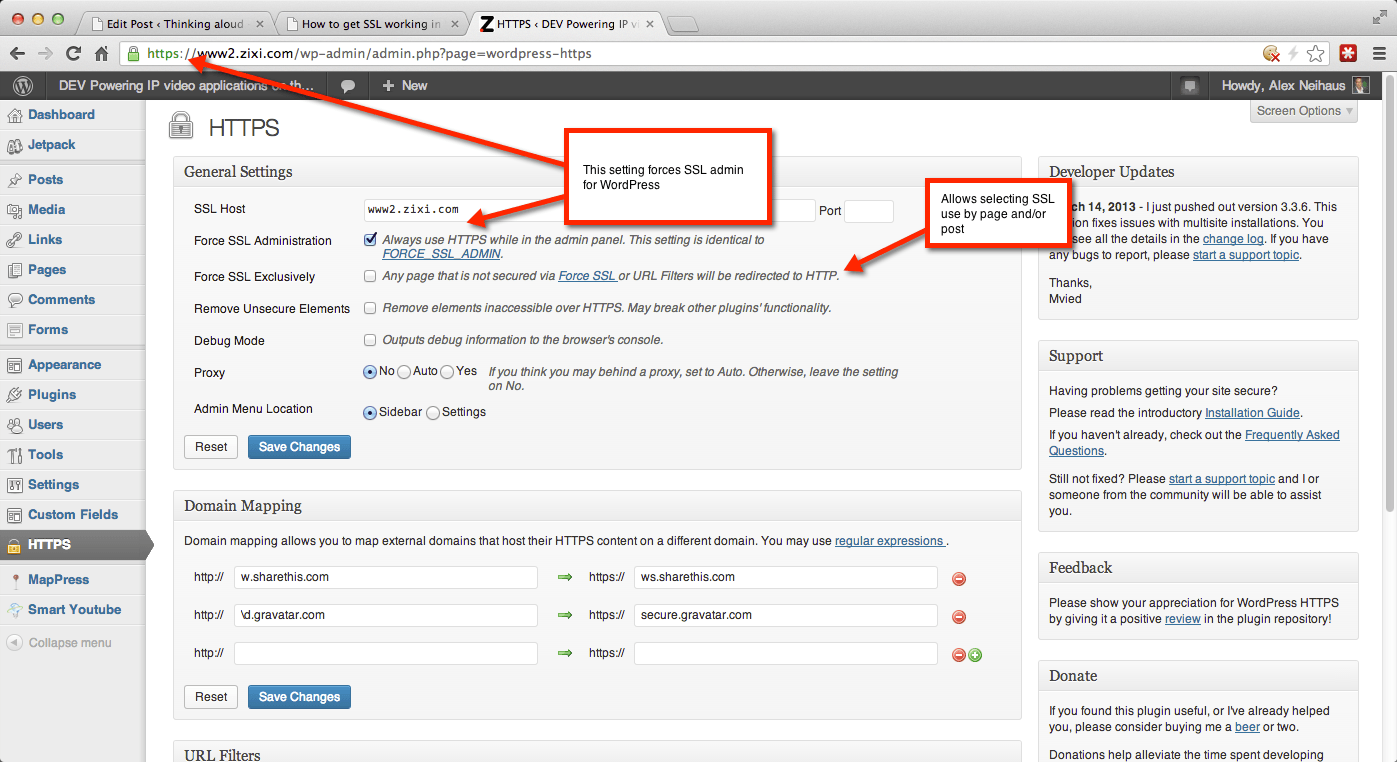
Click to enlarge - Install and configure the WordPress HTTPS plugin. I recommend that you select only two options: Force SSL Administration and Force SSL Exclusively. This first is obvious: you should always work in WordPress admin over SSL. And this setting eliminates the need to add directives in wp-config.php to do so. The second is, IMO, badly named. It says that any page on which you do not force the page to be delivered over SSL will instead be delivered over HTTP. This is precisely the behavior I wanted. On my site, the only page that I want to encrypt, for performance reasons, is my contact form. Everything else should be over a non-encrypted connection because there’s no sensitive info being delivered and no login cookies to spoof. Here’s a screenshot of what it looks like on my system.

WordPress SSL plugin — click to enlarge
I hope this helps you. BTW, if you made it this far, I want to say that today, April 17, is my birthday and I wrote this with the intent of giving the WordPress admin world a present, since I benefited for years from the gift that WordPress is.
Leave a Reply